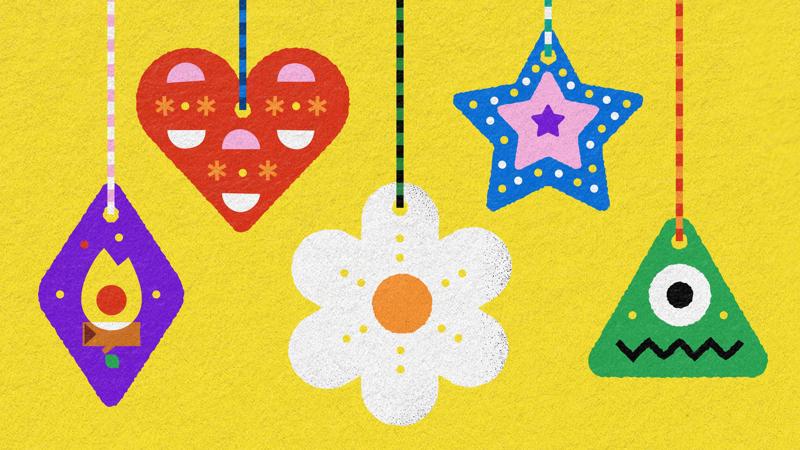
Make salt dough decorations
You’ll need
- Mixing bowls
- Access to water
- Paint
- Pens or pencils
- Scrap paper
- Paint brushes
- Plain flour
- Salt
- Bio-degradable glitter (optional)
- Biscuit cutters or butter knives
- Rolling pins
- Additional decorations (optional)
- Sharp pencil or knitting needle
- Thin ribbon
- Baking sheets
- Check for allergies, intolerances, food-related medical conditions, eating disorders, sensitivities or dietary requirements, then adjust the food items used as needed. This may include making sure there’s no cross-contamination of packaging and no cross-contamination during the storage, preparation, cooking and serving.
- You may need to use separate chopping boards, equipment and utensils, such as tongs or toasters, for different dietary requirements, allergies and foods.
- If you’re unsure, check with the young person and their parents or carers. You can check with the adult directly if it’s a volunteer or helper.
- Some people may not like certain textures and that’s OK. People don’t need to touch all the ingredients if they don’t want to, and no-one should be made to if they don’t want to. You can try to find an alternative for them, such as wearing gloves or using tools to touch the dough.
- At the start of this activity, remind everyone of kitchen or indoor cooking safety rules and how to act safely. Always tie hair back, tuck in neckers and loose clothing, and wear closed toe shoes. Take a look at our kitchen safety tips.
- You may want to run a demonstration on how to use the equipment safely, such as for cooking or chopping ingredients. You could use our kitchen safety activities before this session.
- Make sure any cooking equipment or heat sources, such as ovens and hobs, always have adult supervision, including during free time and arrival times. If anyone struggles with sensing danger, you should consider providing extra adult supervision. This could be especially helpful at unstructured times, such as breaks or waiting to cook.
- Remind everyone to keep their fingers away from any knives. You may want to use blunt, child-friendly knives, or you could also have ingredients pre-chopped.
- If you’re using a gas stove, tabletop hob plates or a mini oven, make sure it’s on a stable heatproof surface and in a clear and open area, with plenty of ventilation. Gas appliances and sources can increase risk of carbon monoxide exposure. Take a look at our guidance on different cooking methods and carbon monoxide.
- You may want to put child-safe locks on cupboard doors to prevent access by young people, especially for cupboards containing matches, cleaning products or chemicals.
- People can work in small groups or as a whole group to bake or cook. Each group should have adult supervision.
- You may want to be in groups, but everyone to use the same cooking source, rather than having each group have their own.
- You may wish for groups to make or prepare the ingredients in a wider, more spacious area, then invite each group into the kitchen to cook one at a time.
- Remember the groups not using the kitchen or cooking will still need to be supervised, always following the Yellow Card.
- Make sure you have all the ingredients ready. You may want to pre-chop or pre-measure some activities.
Before you begin
- Use the safety checklist to help you plan and risk assess your activity. Take a look at our guidance to help you carry out your risk assessment, including examples.
- Make sure all young people and adults involved in the activity know how to take part safely.
- Make sure you’ll have enough adult helpers. You may need some parents and carers to help if you’re short on helpers.
Planning and setting up this activity
- You may want to prepare the salt dough before running the session.
- You may want to run this activity over two weeks to give time to bake and paint the salt dough.
Prepare the salt dough
- Gather everyone in a circle and explain you’ll be making salt dough decorations to celebrate and hang up. Remind everyone taking part that the dough is not edible, so they shouldn’t put anything in their mouths, noses or ears.
- Tell everyone that they’re going to make a salt dough decoration, sculpture or craft.
- Mix together two parts plain flour to one part salt - table salt works well!
- To make a plain dough, slowly add one part water until it’s the right consistency. It needs to be not too crumbly, but not too sticky.
- To make coloured dough, cut the amount of water in half and replace with paint. Add this slowly to your dry mix of salt and flour until it reaches the correct consistency.
- You could also add bio-degradable glitter to make the dough sparkly.
Designing
- Show everyone what is available for making the decorations, sculptures, models or ornaments from the salt dough. You may have different coloured doughs, biscuit cutters in various shapes or butter knives for cutting details in the designs.
- Give out pens and paper, so people can plan and draw out their designs for their ornaments.
- Everyone should take some dough and start to model it.
- People can model the dough however the want to. They could make a sculpture, a pot, a hanging decoration or a table centrepiece.
Making a hanging decoration
- If people want to make a hanging decoration, roll it out onto a floured surface until it’s around 5mm thick.
- When the dough’s ready, they should then cut out their shape.
- Once they’re happy with their design, use a sharp pencil or a knitting needle to carefully create a hole at the top. This hole can be used to put string, ribbon or twine through for the decoration to be hung up.
- Be careful not to make the hole too close to the edge, as this could mean it'll break once baked.
Bake
- Place the finished decorations on a flat baking sheet.
- Bake the salt dough in an oven, set on its lowest temperature, for three hours. An adult volunteer may want to do this outside of the meeting.
- When cooked, use heatproof gloves to remove the tray out of the oven and turn the oven off.
- Leave the tray on a safe, heatproof and stable surface to cool down completely, away from young people.
Decorate
- After they've cooled down, the salt dough can be painted or coloured using marker pens. You could also glue or stick craft items onto them, such as sequins, gems or stickers.
- If you’ve made a hanging decoration, thread a ribbon or twine through the hole in the top and tie a knot. Then, choose somewhere to hang up your decoration and enjoy!
Reflection
This activity was about trying new things by learning to make salt dough and making your own decoration.
Throughout the year, there are lots of celebrations and traditions. How do you celebrate at home? Do you have any traditions?
Lots of people like to decorate their homes with special objects during the different celebrations. Discuss where you would like to hang your decorations.
Safety
All activities must be safely managed. You must complete a thorough risk assessment and take appropriate steps to reduce risk. Use the safety checklist to help you plan and risk assess your activity. Always get approval for the activity, and have suitable supervision and an InTouch process.
You must run your activities in line with the Safeguarding Code of Conduct for Adults (Yellow Card) and report any concerns to the UK HQ Safeguarding Team.
- Sharp objects
Teach young people how to use sharp objects safely. Supervise them appropriately throughout. Store all sharp objects securely, out of the reach of young people.
This is a great base recipe for making models as well. It can be used to construct sculptures or standing ornaments. Some other ideas are:
- Make a standing snowman.
- Making handprint ornaments.
- Making candle holders.
- Emboss words or a name into the dough. This can be coloured in later.
Simple designs work best with this dough, as it isn’t sturdy until baked. The bigger the model, the longer it will take to harden in the oven.
Some people may not like to touch the dough, so offer gloves or further tools for them to shape the dough with. Make sure everyone has everything they need to complete the tasks in this activity. Pair up or have helpers lend a hand where needed.
Double-check whether anyone has any allergies or skin sensitivities to any of the materials used in this activity. Only source materials that are suitable for everyone to use safely.
All Scout activities should be inclusive and accessible.


Consider what celebrations are meaningful to your group - this is an activity that can be themed around different holidays and events.