Build a star fire
You’ll need
- Kindling (for example, small sticks)
- Tinder (for example, cotton balls and petroleum jelly)
- Firewood
- Fire lighter (for example, matches or ferro rod)
- Buckets
- Wooden skewers
- Marshmallows (optional)
Before you begin
- Use the safety checklist to help you plan and risk assess your activity. There's also more guidance to help you carry out your risk assessment, including examples.
- Make sure all young people and adults involved in the activity know how to take part safely.
- Make sure you’ll have enough adult helpers. You may need some parents and carers to help if you’re short on helpers.
Get ready for fire
- Make sure the outdoor area you visit is accessible for everyone, choosing a suitable place for drop off and collection. You may need to think about avoiding steps or steep gradients or including frequent breaks.
- Ask the landowner’s permission to build and light a campfire. The fire needs to be located on specified flat and stable surface, such as on a designated campfire circle.
- Check the weather and wind forecast. The wind direction needs to be considered and allowed for.
- Ask people to bring any clothing or items to keep warm that they don't mind smelling of campfire smoke, such as coats or hats.
- The size of the fire must reflect the location. Fires should not be allowed to get too big for the situation. Always consider the space, surrounding objects (such as fences, overhead trees and wires, and buildings), the number of people and the time it will need to be safely extinguished.
- One adult should be dedicated to supervising the fire at all times, including during break and arrival times.
- Have a fire safety briefing and demonstrate how to safely build or cook on a campfire, as well as how to use certain equipment safely. You could create an example campfire for people to copy.
- Use a safety line around the campfire, making sure that people don’t cross it unless specifically asked.
- Make sure fire fighting equipment is available and make sure that cold water is available nearby. There should be at least a bucket of water, although running water is best if possible. Other options include appropriate fire extinguishers, fire buckets, spades, and beaters.
Build a star fire
- Gather everyone together and tell them you’re going to build a star fire.
- Ask everyone to get into small groups. Make sure each group has enough space, as well as a clear and safe area to light a fire.
- Collect six seasoned or dry logs approximately 7cm thick, and a collection of smaller dry sticks of different sizes and thickness. Always wear appropriate gloves when collecting wood.
- Remind people to about the sticks as ‘dog, cat and mouse tails’ for
- Arrange the six large logs into a star shape that meets in the centre.
- Use three smaller sticks to build a tripod over the centre of the logs.
- Add more twigs that are about a finger width thick around the tripod to make a teepee shape. Leave one side open and place your tinder and kindling in the space.
- Keep carefully adding more twigs of different sizes around the outside, leaving a gap to light the tinder.
Light your star fire
- Place a firelighter in the kindling and light it to start the star fire using the flint and steel - remember, practice makes perfect.
- As the six larger logs burn down, an adult should use thick, heat-resistant gloves, where appropriate, to push the logs further into the centre of the star. Keep extra logs ready in case you need to refuel the fire.
Toast your new skills (optional)
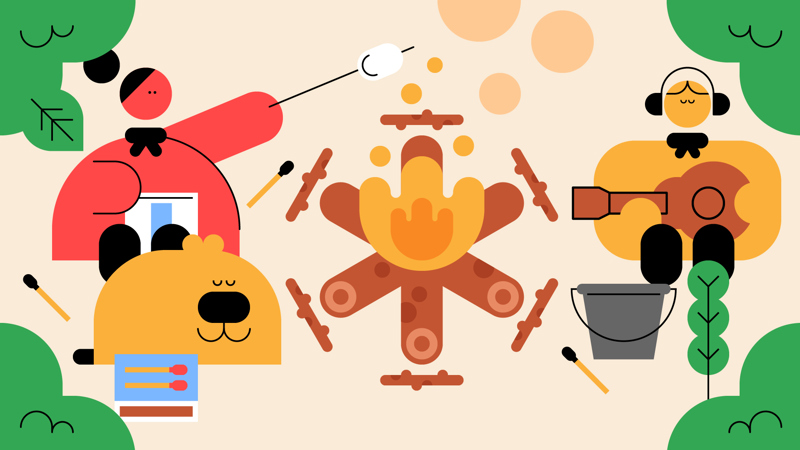
- Gather round the fire you've built and celebrate your achievements by putting a marshmallow on a toasting fork or skewer and toasting it over the flames.
- If you use wooden skewers, make sure to soak the skewers in water at least 30 minutes before using them to toast marshmallows.
Extinguish the fire
- To extinguish the fire, stop adding wood and wait for the fire to burn down and turn to ash.
- Pour water all over the fire.
- Stir the ashes with the stick to make sure all the embers are put out.
- Care should be taken to make sure equipment has fully cooled before moving it at the end of the session.
- It’s important to leave no trace. Make sure an adult tidies the fire area, returning it to the same condition it was in when you arrived, this may include replacing any turf you moved.
Reflection
This activity helped you to value the outdoors. Did you enjoy being outside? How did the fire change your experience of being outdoors? How did you make sure your fire didn’t damage the outdoors? Did you feel comfortable being outside?
This activity has taught you a useful practical skill. While the fires you’ve built are dying down, you could reflect on our relationship with fire.
Do you know more about fire now? What are some of the uses of fire? How have people used fire in the past? How do we use fire now? What are the dangers of fire?
How can you prevent these dangers? What first aid skills should everyone have before dealing with fire?
Safety
All activities must be safely managed. You must complete a thorough risk assessment and take appropriate steps to reduce risk. Use the safety checklist to help you plan and risk assess your activity. Always get approval for the activity, and have suitable supervision and an InTouch process.
You must run your activities in line with the Safeguarding Code of Conduct for Adults (Yellow Card) and report any concerns to the UK HQ Safeguarding Team.
- Fires and stoves
Make sure anyone using fires and stoves is doing so safely. Check that the equipment and area are suitable and have plenty of ventilation. Follow the gas safety guidance. Have a safe way to extinguish the fire in an emergency.
- Cooking
Teach young people how to use cooking equipment safely. Supervise them appropriately throughout. Make sure it’s safe to use and follow manufacturers’ guidelines for use.
- Food
Remember to check for allergies, eating problems, fasting or dietary requirements and adjust the recipe as needed. Make sure you’ve suitable areas for storing and preparing food and avoid cross contamination of different foods. Take a look at our guidance on food safety and hygiene.
- Carbon Monoxide
Carbon monoxide (CO) is a serious risk, so make sure you cook or use appliances in a properly ventilated area. If you need a sheltered cooking area, consider an open sided gazebo, dining shelter or a marquee that has sufficient air circulation and ventilation. Take a look at our further guidance on carbon monoxide.
- Heavy and awkward objects
Never lift or move heavy or awkward items alone. Ask for help or, if possible, break them down into smaller parts.
- Visits away from your meeting place
Complete a thorough risk assessment and include hazards, such as roads, woodland, plants, animals, and bodies of water (for example, rivers, ponds, lakes, and seas). You’ll probably need more adult helpers than usual. Your risk assessment should include how many adults you need. The young people to adult ratios are a minimum requirement. When you do your risk assessment, you might decide that you need more adults than the ratio specifies. Think about extra equipment that you may need to take with you, such as high visibility clothing, a first aid kit, water, and waterproofs. Throughout the activity, watch out for changes in the weather and do regular headcounts.
- Outdoor activities
You must have permission to use the location. Always check the weather forecast, and inform parents and carers of any change in venue.
Plenty of activities can take place around the fire.
Why not try marshmallow toasting? Pop a marshmallow on a stick and hold it close to the fire. Avoid using small sticks for this – aim for sticks that are roughly be the length of an adult’s arm. Remember to allow time for the marshmallow to cool down before biting into it!
Once you’ve mastered the art of marshmallow toasting, you might be ready to create s’mores. Explore the delights of squishing a toasted marshmallow between two chocolate digestive biscuits for a campfire culinary delight. They’re so good you’ll want s’more!
Consider having an extra leader to float between groups and offer one-to-one support when needed. This activity could also be made accessible by starting a smaller fire in a metal biscuit tin – this could be easily controlled.
All Scout activities should be inclusive and accessible.