Salt dough badges
You’ll need
- Oven
- Baking trays
- Pens or pencils
- Paint
- Paint brushes
- Mixing bowls
- Flour
- Salt
- Round cookie cutters
- Baking parchment
- Tools for moulding (for example, plastic picnic knives, pencils, cocktail sticks)
Before you begin
- Make enough salt dough for everyone to have enough to make a badge each.
- Use the proportions of two parts flour, one part salt, and one part water. For example, two cups of flour, one cup of salt and one cup of water. Mix the flour and salt in a bowl, and add the water. The dough should come together into a clean ball.
- Store the dough in an airtight container until it’s needed.
Choose a badge
- Everyone should talk about some of the badges they’ve enjoyed working on, and which ones they’d like to work on next.
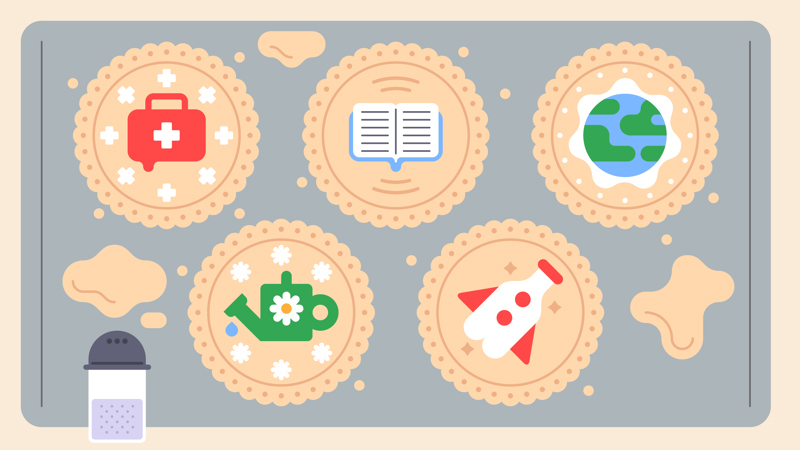
- Everyone should look at the badges on people’s uniforms (or some pictures of badges) and talk about how the pictures on a badge tell people what it’s for.
- Everyone should choose one badge they’d like to work on next.
Get crafting
- The person leading the activity should give everyone a ball of dough. Everyone should roll or press their ball flat, until it’s about one centimetre thick.
- Everyone should use a cookie cutter to press out a circle for their badge.
- Everyone should mould, press, and carve the rest of their dough (that was around the edges of the circle they cut out) to make the shapes or design to go on the front of the badge.
- Once everyone’s finished their badge, they should put them on a baking tray lined with backing parchment. They should put their initials next to their badge, to help them remember which is theirs.
- An adult should bake the badges at a low temperate for between two and three hours. They’re ready when they’re solid. The adult should leave the badges to cool.
Get painting
- Everyone should collect their badges. If any pieces have fallen off anyone’s badge, an adult should use a clear glue to stick them back on again.
- Everyone should use paints or pens to add detail or colour.
- Once the badges or dry, an adult should help everyone add a layer of PVA glue or varnish on top.
Reflection
This activity was a chance for everyone to try a new skill, while thinking about badges. Was everyone pleased with their salt dough models? Did anyone find anything especially tricky? People may have found techniques that worked well; people could share their top tips, or the person leading the activity could point out anything they spotted someone doing well. Some people may have used tools to make lines, or rolled sausage shapes to press onto the dough. Would anyone do anything differently if they did this activity again? Everyone should look at the badges and talk about the designs people chose. Were there any really popular badges, that more than one person would like to do? The person who plans the sessions should use this to help them plan for the future. Well done to everyone who made thoughtful choices about their badges, and for practising a new creative skill.
Safety
All activities must be safely managed. You must complete a thorough risk assessment and take appropriate steps to reduce risk. Use the safety checklist to help you plan and risk assess your activity. Always get approval for the activity, and have suitable supervision and an InTouch process.
You must run your activities in line with the Safeguarding Code of Conduct for Adults (Yellow Card) and report any concerns to the UK HQ Safeguarding Team.
- Sharp objects
Teach young people how to use sharp objects safely. Supervise them appropriately throughout. Store all sharp objects securely, out of the reach of young people.
- Glue and solvents
Always supervise young people appropriately when they’re using glue and solvent products. Make sure there’s plenty of ventilation. Be aware of any medical conditions that could be affected by glue or solvent use and make adjustments as needed.
You could prepare and roll out the dough before starting the craft. For an extra challenge, groups could measure the ingredients and mix them to make their own dough.
Make any adjustments you need for anyone with allergies. Anyone who doesn’t want to touch the dough could wear gloves, use tools to carve a picture, or bake a plain dough badge to paint on.
All Scout activities should be inclusive and accessible.

Use salt dough to create more models. You could try pressing shells, stones, leaves, or plastic dinosaurs into salt dough to create a ‘fossil’. Once an adult’s baked them, and they’re cool, paint it with PVA glue and bury them outdoors to excavate. You could use them as treasure in a treasure hunt, or in an orienteering activity.
This is a great way to learn about the badges and activity everyone would like to do in the future – listen to young people’s suggestions.