Pit stop practice
You’ll need
- Wheel wrench
- Vehicle jack
- Replacement wheel
- Access to a car (with the correct manual)

Before you begin
- Use the safety checklist to help you plan and risk assess your activity. Additional help to carry out your risk assessment, including examples can be found here. Don’t forget to make sure all young people and adults involved in the activity know how to take part safely.
- Make sure you’ll have enough adult helpers. You may need some parents and carers to help if you’re short on helpers.
Running these activities
- This activity’s part of a series of short activities in the Scouts Mechanic Activity Badge.
- Decide how you’ll run these activities. You could run a mechanics activity day with a few vehicles, so people can try different tasks on different vehicles at the same time. You could also run the activities as short bases during a meeting (while other activities take place).
- Decide who’ll run and supervise this activity. All of the practical activities for the Mechanic Badge should be run and supervised by a qualified mechanic (or someone with enough knowledge gained through experience).
Chat about tyres
Ask whether anyone knows when a wheel may need changing. There are lots of reasons, including a flat tyre or unbalanced wheel. It’s important to make sure it’s done right as wheels keep you on the road, turn, and help you stop. Changing a wheel can be simple, but it must be done correctly.
To watch in full screen, double click the video
Guidelines for tyres
These guidelines are generic guidelines for modern vehicles. Always check the handbook for the vehicle you’re using or get advice from a qualified or experienced mechanic: we don’t want any broken cars on our hands. This activity must always be supervised and guided by someone competent.
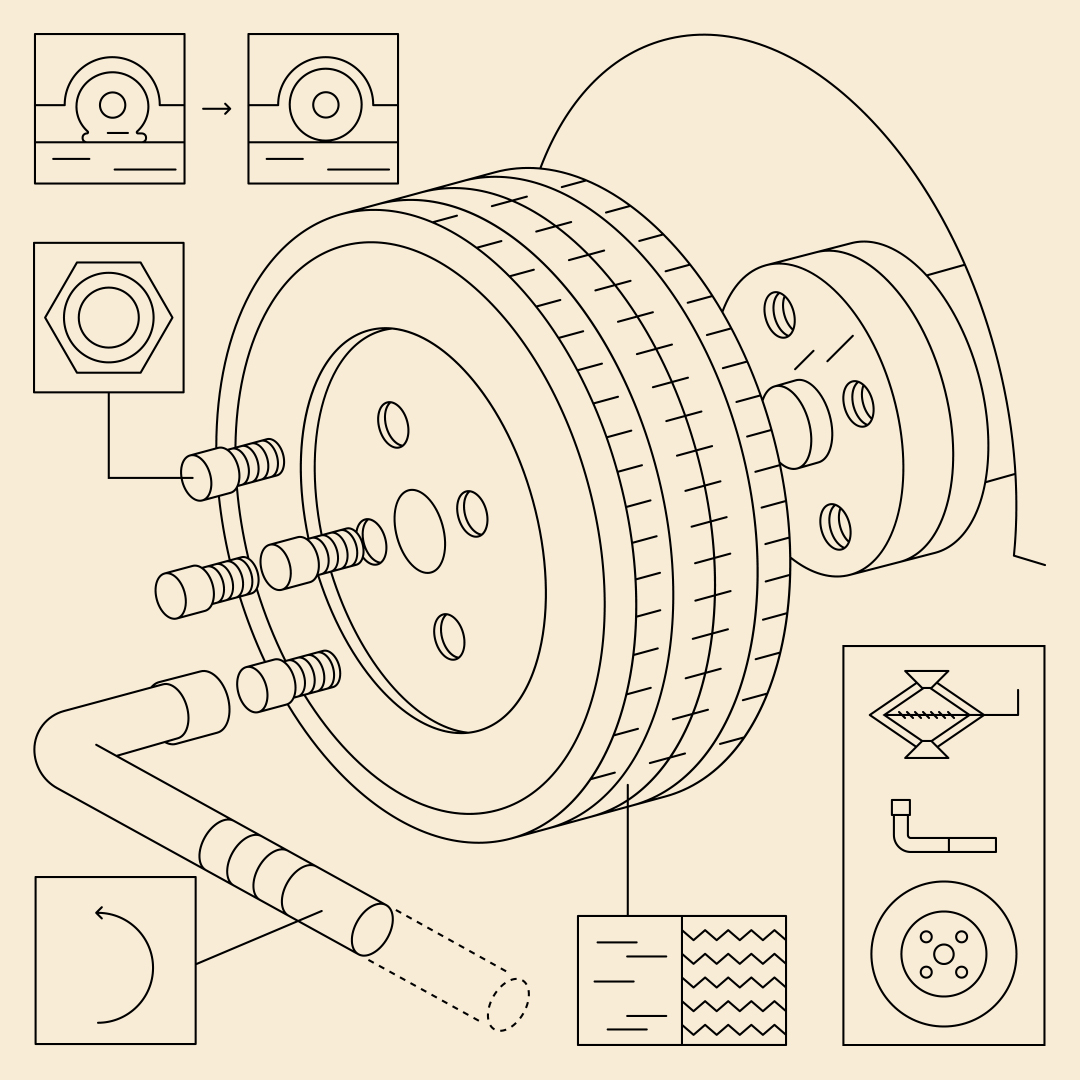
- Gather all of your equipment. You’ll need a vehicle jack with the right weight rating, a wheel wrench that fits the wheel nuts on your vehicle, and the replacement wheel. You may need an additional tool to remove any locking wheel nuts, depending on your vehicle. If you’ve got them, wheel wedges or chocks can be used for extra security.
- Loosen the wheel nuts slightly (but don’t remove them yet). You may need to remove the hubcap or wheel cover first, before you can access the wheel nuts. If they’re tricky to remove, a wrench extension can be used to provide more force. Some vehicles have locking nuts (to stop wheels being stolen). They can only be removed with a special tool (which comes with the vehicle) that fits over the wheel nut and allows it to be removed with the wheel wrench.
- Follow the manufacturer’s guidelines to find the vehicle jacking point. The vehicle will be reinforced here – putting the jack in the wrong place can damage the car.
- Use a suitable (weight-rated) vehicle jack at the jacking point. Raise the car just enough so the tyre’s off the ground.
- Now the vehicle’s raised, remove the wheel nuts all the way. Keep them somewhere safe.
- Remove the wheel from the wheel studs and place it to one side. Be careful, as it’ll be heavy – ask for help if you need it and stay safely distanced.
- Fit the new wheel onto the wheel studs.
- Hand-tighten the wheel nuts. Be careful not to cross-thread them.
- Gently lower the vehicle until the tyres rest on the ground. Remove the jack.
- Tighten the wheel nuts in a criss-cross (or star) pattern so the pressure stays even across them. Tighten them according to the manufacturer’s guidelines – a torque wrench may be useful to make sure they’re tightened with the right force.
- Check the tyre pressure on the replaced wheel. Find out how with Tyre pressure top-up.
- Disposed of the removed wheel. A qualified mechanic may be able to repair it, otherwise, take it to a recycling centre.
- Wash your hands thoroughly – wheels and tyres can get very dirty.
Reflection
This activity was all about developing skills. Why’s it useful to be able to get stuck into vehicle maintenance?
It helps keep people safe and can save you money too. It’s also better for the environment to look after vehicles so less resources are used to repair avoidable faults (or even replace cars).
Was it easy to learn this skill? Is this skill the same for every single vehicle, or would people still need to check the manual?
This activity also gave people the chance to be independent. How did it feel to get stuck into a practical task?
What role did the adults have in this activity? They supervised to make sure no one (and no vehicles) got hurt.
Is changing the wheel yourself always the best choice? When might it be best to call for help from a breakdown company?
Everyone should chat about what they could do in different situations featuring a flat tyre. Always seek professional advice from a breakdown company or the police if you’ve broken down and aren’t sure what to do.
Safety
All activities must be safely managed. You must complete a thorough risk assessment and take appropriate steps to reduce risk. Use the safety checklist to help you plan and risk assess your activity. Always get approval for the activity, and have suitable supervision and an InTouch process.
- Chemicals
This task involves the use of potentially harmful fluids or chemicals. Make sure you follow all relevant safety guidance. Make sure you dispose of them appropriately too, in line with safety guidance.
- Heavy and awkward objects
Never lift or move heavy or awkward items alone. Ask for help or, if possible, break them down into smaller parts.
- Manufacturer’s guidelines
All vehicles will be different so always follow the manufacturer’s guidelines.
- Outdoor activities
You must have permission to use the location. Always check the weather forecast, and inform parents and carers of any change in venue.
- PPE
Before completing this activity make sure you have suitable personal protective equipment (PPE). This could include eye or ear protection, gloves, and anything else you need to protect yourself. You’ll know what you need as a result of completing the risk assessment for the activity.
- Vehicle readiness
Before completing this activity, make sure that the engine’s fully cooled. The vehicle should be parked on flat, stable ground with the parking brake applied.
While this activity must always be supervised and guided by someone competent, they can vary the level of hands-on help they provide.
People with more knowledge and experience should do more for themselves (with supervision).
People with less knowledge and experience may need more hands-on help.
The person supervising and guiding the activity can help out with parts anyone finds tricky, such as reading instructions, lifting or moving heavy objects, or doing the smaller or more fiddly tasks.
All Scout activities should be inclusive and accessible.
This activity’s just one area of vehicle maintenance and repair. Encourage anyone who’s interested to complete the other activities in the Scouts Mechanic Activity Badge.
Involve young people in the decision about how to do the Scouts Mechanic Activity Badge (if they want to do it at all) – would they rather do the activities separately over different meetings or as part of an activity day? Just because this activity needs supervision (and you can’t alter the content or safety guidance), doesn’t mean young people can’t have a say.
