Make paper snowflakes
You’ll need
- Scissors
- Sticky tape
- Stapler
- 6 evenly sized square pieces of paper (10cm² works well)
Before you begin
- Use the safety checklist to help you plan and risk assess your activity. There's also more guidance to help you carry out your risk assessment, including examples. Don’t forget to make sure all young people and adults involved in the activity know how to take part safely.
- Make sure you’ll have enough adult helpers. You may need some parents and carers to help if you’re short on helpers.
- Download the asset and consider printing it to assist in delivering the instructions.
Run the activity
- Everyone should have their 6 pieces of square paper ready along with all necessary equipment. You could split everyone into groups to share the equipment. Use of scissors should be supervised.
- Show everyone how to complete each step of the instructions to make their snowflake. You could make an example snowflake so the participants can see what they’re working towards.
How to make the snowflake
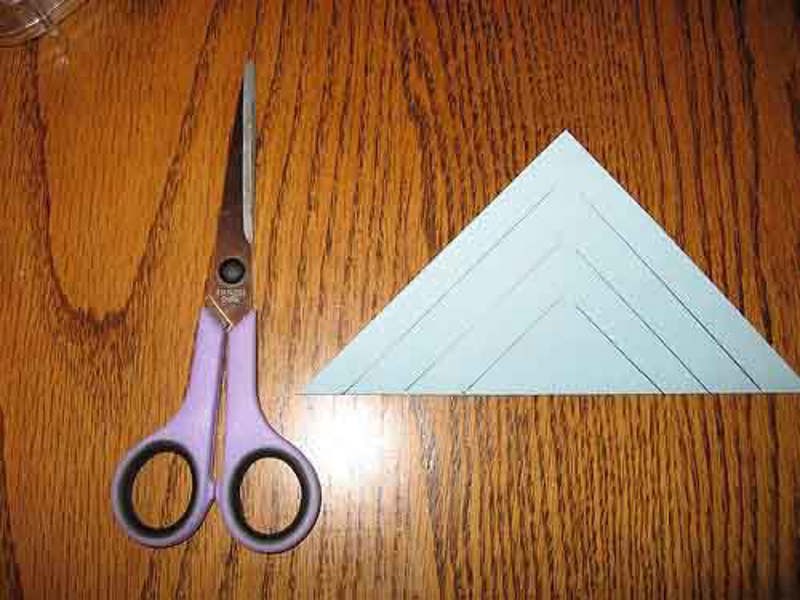
Step 1
Fold each of the 6 pieces of paper in half, diagonally. If the paper you're using doesn't make a perfect square, cut off the edge that sticks out (rectangular edge) and make it align perfectly.
Step 2
Cut 3 lines each side of the triangle from the folded edge (as per image on step 1), making sure not to cut through the unfolded paper edges. The cut lines should be parallel to one another each side and come close to meeting in the middle but not touch; leave a small space between them. To make this easier, fold the triangle in half. This way you'll cut both sides at once, making a very symmetrical snowflake.
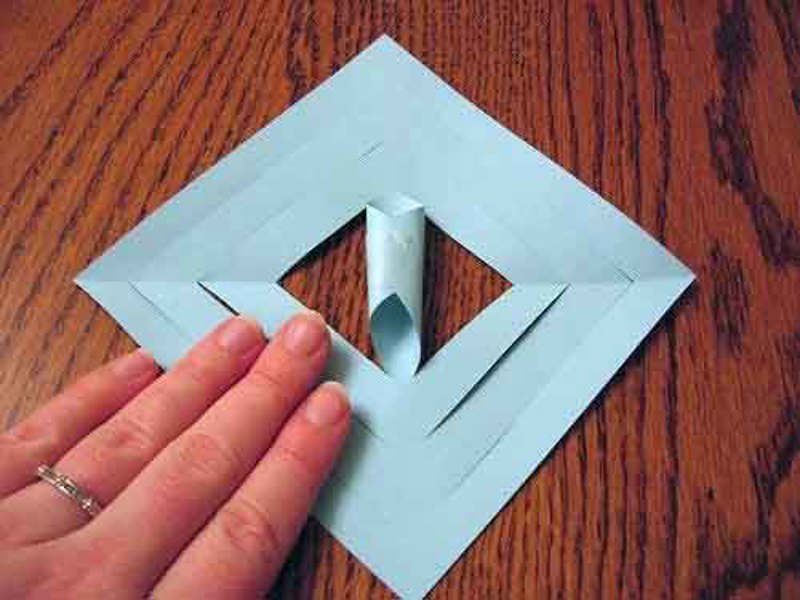
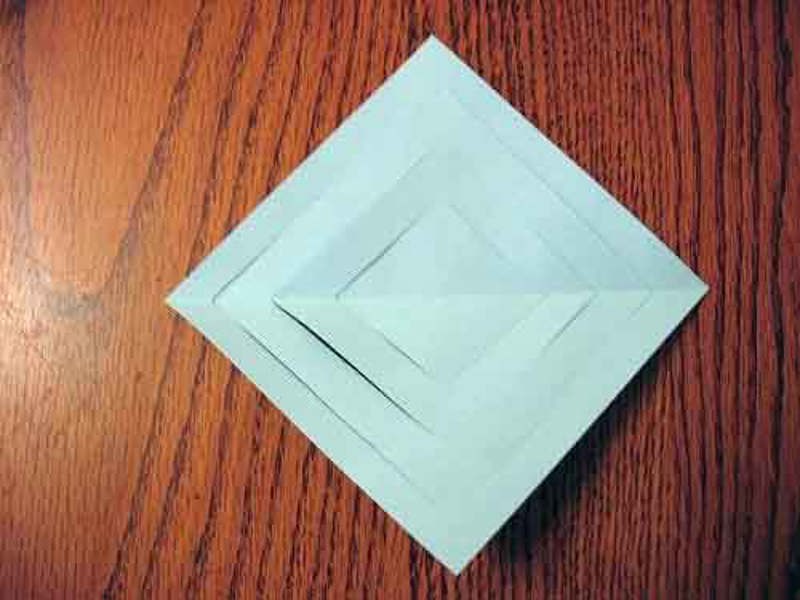
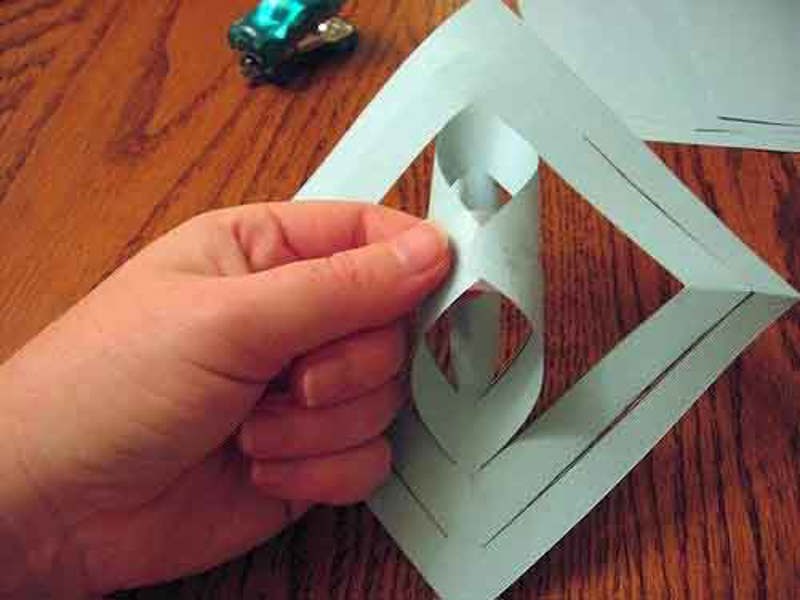
Step 3
Unfold your paper and turn it so that the diamond shape is facing you. Roll the first two innermost paper lines together to form a tube. Tape these two pieces together. You should see triangle shapes on each side of the roll.
Step 4
Turn the diamond over to the other side. Take the next two paper lines and pull them together on the opposite side of the tube and tape together as before. This will be a more rounded shape and wider than the first tube.
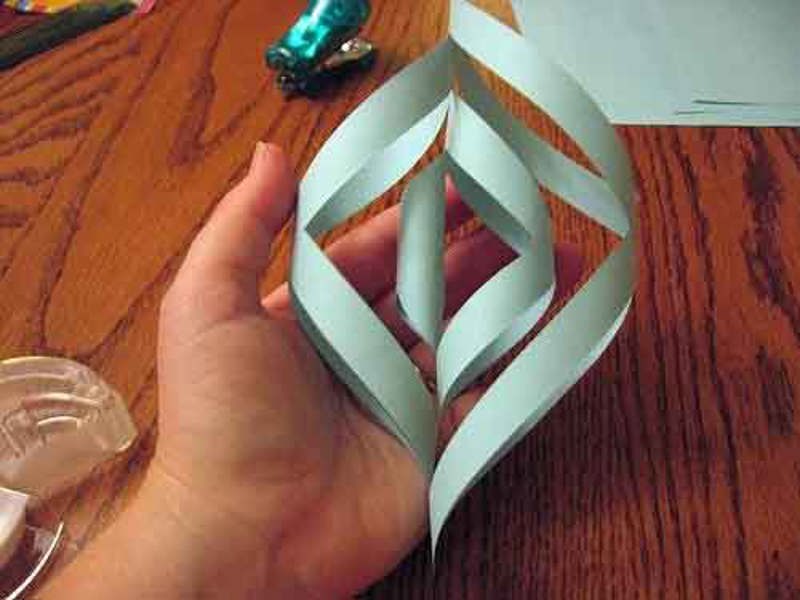
Step 5
Keep turning the paper and joining the paper lines together on opposite side until all paper lines have been joined.
Step 6
Repeat this process (steps 2 - 5) with the remaining 5 pieces of paper.
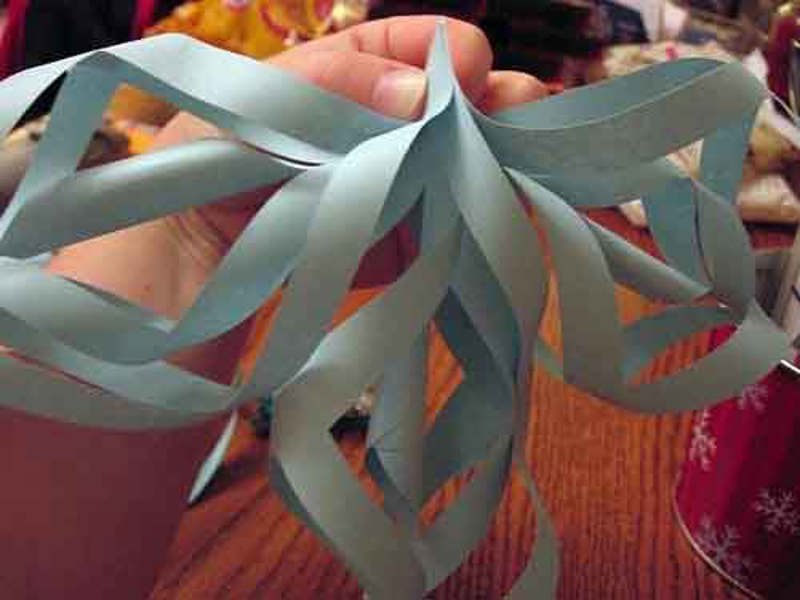
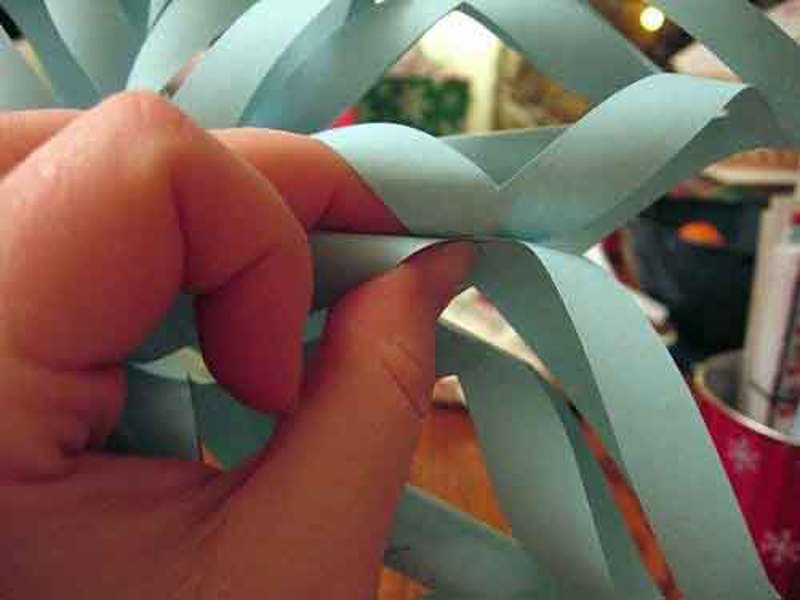
Step 7
Join 3 of the completed rolled pieces together at one end (draw together with your fingertips) and staple together using the other hand. Do the other 3 pieces the same way. Now you will have 2 pieces consisting of 3 strands or "arms" each.
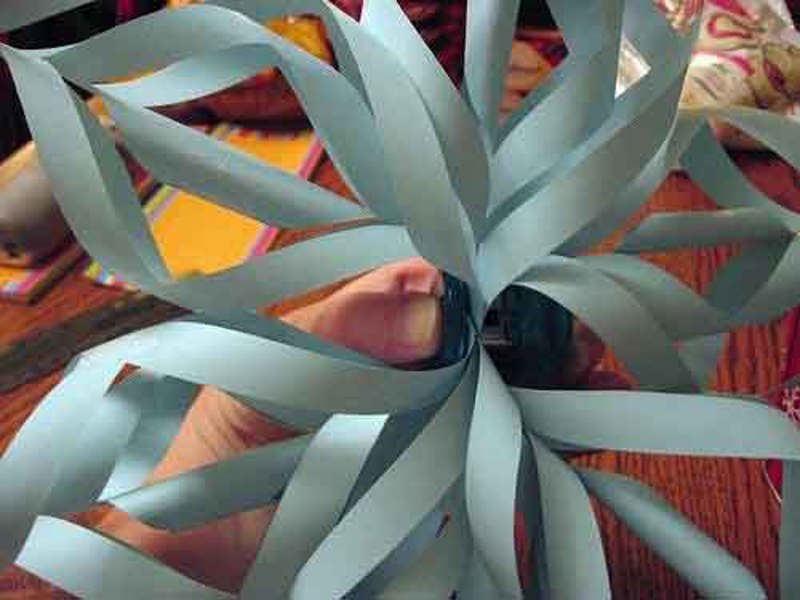
Step 8
Staple the two new pieces together in the middle. You will almost have the snowflake shape by now.
Step 9
Staple where each of the 6 arms meet. This ensures that the snowflake shape is pulled into place.
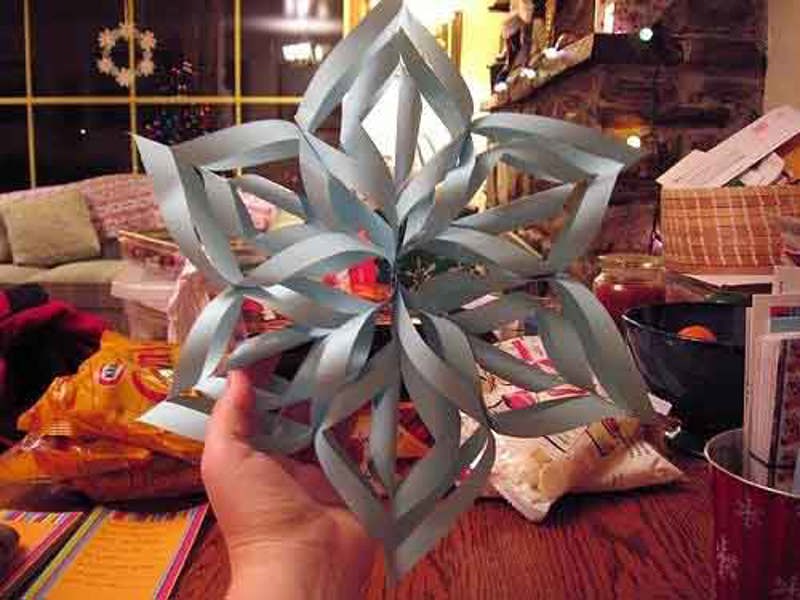
Step 10
Choose one point to be at the top of your snowflake and tie a piece of thread on for hanging. Pierce a tiny hole with a needle and thread through the metallic thread and tie with a small knot, twice. Do this very gently to avoid tearing the paper.
Reflection
What do snowflakes look and feel like? A snowflake is an ice crystal that, once achieving a sufficient size, falls through the Earth’s atmosphere as snow. Each snowflake has a unique path to the ground, passing through different clouds of different moisture, meaning that each snowflake will grow in a unique way.
What does everyone have in common? Discuss each of the ways that we are all unique and special. What would the world be like if we were all the same? We have all had our own unique life experience to lead up to this moment. What are the benefits of being around different people of different life experience?
Safety
All activities must be safely managed. You must complete a thorough risk assessment and take appropriate steps to reduce risk. Use the safety checklist to help you plan and risk assess your activity. Always get approval for the activity, and have suitable supervision and an InTouch process.
You must run your activities in line with the Safeguarding Code of Conduct for Adults (Yellow Card) and report any concerns to the UK HQ Safeguarding Team.
- Scissors
Supervise young people appropriately when they’re using scissors. Store all sharp objects securely, out of the reach of young people.
- Sharp objects
Teach young people how to use sharp objects safely. Supervise them appropriately throughout. Store all sharp objects securely, out of the reach of young people.
- It might be useful to pre-cut the squares to allow the participants to focus on assembling their snowflake.
- It’s up to you (and your group) whether people work on their own, in pairs, or in small groups.
Make sure everyone can be involved. Consider suggesting a simpler snowflake designs to begin with, and introduce this design as an optional next step.
All Scout activities should be inclusive and accessible.
You could use these to decorate your meeting place for the winter. Consider also using different coloured paper to add variety to your snowflakes. You could also use paper that was intended for the recycling and repurpose it (make sure that it is clean and fit for purpose).