Make upcycled planters
You’ll need
- A4 paper
- Rope
- Scissors
- Sticky labels
- Coloured pens or pencils
- Seeds
- Gardening gloves
- Compost
- Cotton wool balls
- Garden fork
- A sharp implement, such as a screwdriver
- Watering can
- Gravel or stones
- Yoghurt pot
- Kitchen roll
- Cress seeds
- Wood nails (optional)
- Breathable membrane (optional)
- Items to use as recycled planters, such as old wellies, shoes, trainers, bags, old or punctured balls, pallets and so on
Before you begin
- Use the safety checklist to help you plan and risk assess your activity. There's also more guidance to help you carry out your risk assessment, including examples.
- Make sure all young people and adults involved in the activity know how to take part safely.
- Make sure you’ll have enough adult helpers. You may need some parents and carers to help if you’re short on helpers.
Planning this activity
- Ask people to bring something to make into a planter. You could give a list of suggestions. Some easy, simple options are old wellies and shoes, tin cans, yoghurt pots, empty jars or other items of clean recycling.
- Use peat-free compost, as this is better for the environment.
- If using plants, choose ones that are native to the UK and pesticide and peat-free. For seeds, choose ones that are organically grown and not genetically modified.
Get ready to plant
- Everyone should chat about what plants need to grow: light, water, and nutrients (usually from soil).
- Explain that you don’t need acres of green space to grow things. It’s easy to rummage through the recycling to turn upcycle things into interesting, practical planters.
- Ask everyone to hold up the item of recycling they’ll be turning into a planter. Take a look around and see the variety of different items people will use.
- To start, adult volunteers should help everyone make holes for drainage. The best way to do this depends on the item – you may want to drill holes or puncture the planter with a sharp screwdriver or sharp nail. Put something like a block of wood behind the surface you’re making holes in. We’ve included instructions for specific items below.
- Next, people should line the bottom of the planters with gravel or stones to help water to drain.
- Then, everyone should fill up the planter with peat-free compost.
- Give everyone some plants or seeds to add to their planter.
- Everyone should make the finishing touches. They could add labels to tell people what they’ve planted, stand their planter on a tray or plate to catch water, or figure out a way to hang their planter from a hook, shelf or outside.
- People can take their planters home or place them outside the meeting place. Remind them to take care of the plants by watering them every few days when the soil begins to dry out.
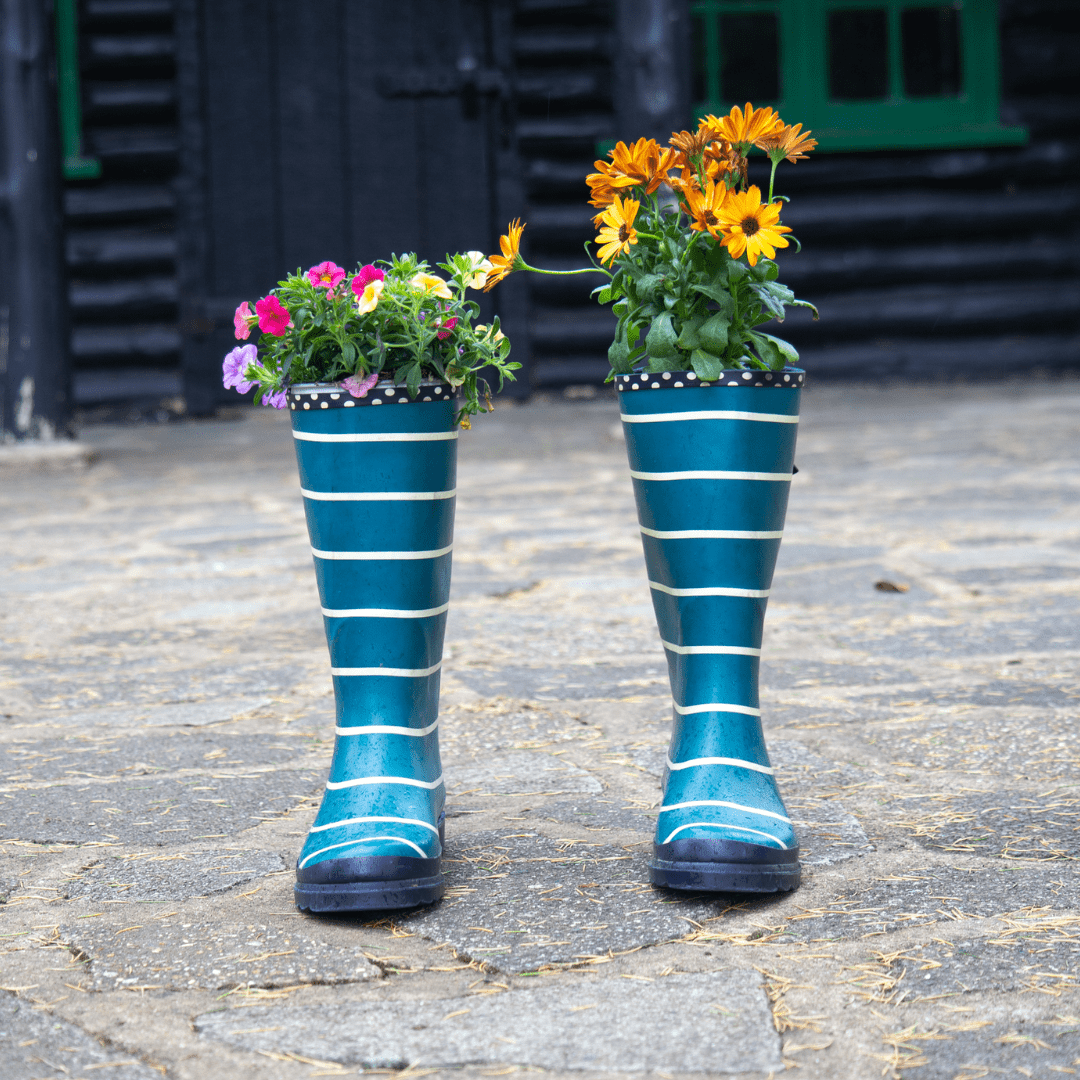
Pull ripped shoes or trainers from your cupboard or fetch the hole-riddled wellies collecting water outside. They’ve got a new life as a planter waiting for them. You could also use old cloth bags or even old handbags – just make sure the owner agrees first!
- If you’re using a shoe, remove the laces and pull out the tongue to get as much potting space as you can.
- Make sure there’s drainage so extra water can escape. You may need to make holes in the soles with a sharp screwdriver or sharp nail. Put a block of wood on the other side, so the sharp end goes into the wood. An adult should help with this. .
- Line the bottom of the shoe, welly or bag with gravel or stones.
- Add some peat-free compost, then put in your plants or sow some seeds. Why not try adding a variety of plants with different coloured flowers to attract lots of pollinators?
- Label your planter, so you know what’s inside. Continue to add water every few days when the soil begins to dry out.
- Decide how you’ll display the planter. You could stand it on the ground outside or use nails to fix it to a wall or fence.
You may not be able to play with punctured balls – but there’s no need to throw them away. Give them a new purpose, and give a plant a new home.
- Use sharp scissors or a craft knife to cut out a section of ball about two thirds of the way up. This means so you can see (and plant) inside the ball. An adult should help with this.
- Unless there are already holes in the base of the ball, stand the ball on a block of wood and use a screwdriver or large nail to make some holes for drainage. Again, an adult should help with this.
- Create a loop for hanging by make four holes equally spaced around the ball, about three centimetres below the rim. Thread strong twine or thin rope through to meet at the top and tie a knot.
- You don’t have to create a loop – you could also attach the planter to a pallet, fence, or wall with nails or tacks.
- Decide whether you’ll cut some slits in the sides of the ball, so plants can poke out from all angles.
- Line the bottom of the ball with gravel or stones.
- Add some peat-free compost, then put in your plants or sow some seeds.
- Label your planter, so you know what’s inside. Continue to add water every few days when the soil begins to dry out.
- Display your planter for everyone to enjoy.
A pallet on its side makes a great vertical planter for trailing plants, such as aubrietia or campanula. They don’t take up too much space on the ground so they work well in small areas.
- Before using it, make sure the pallet's solid, with no loose slats.
- Check for loose staples or nails before you begin too.
- Line one side and the bottom with a breathable membrane.
- Secure the pallet to a wall carefully. An adult should help with this.
- You could stack two of three pallets up to create a wall effect, However, they must be secured very firmly to the wall.
- Line the bottom of the pallet with gravel or stones.
- Add some peat-free compost, then put in your plants or sow some seeds.
- Label your planter, so you know what’s growing. Continue to add water every few days when the soil begins to dry out.
- Display your planter for everyone to enjoy.
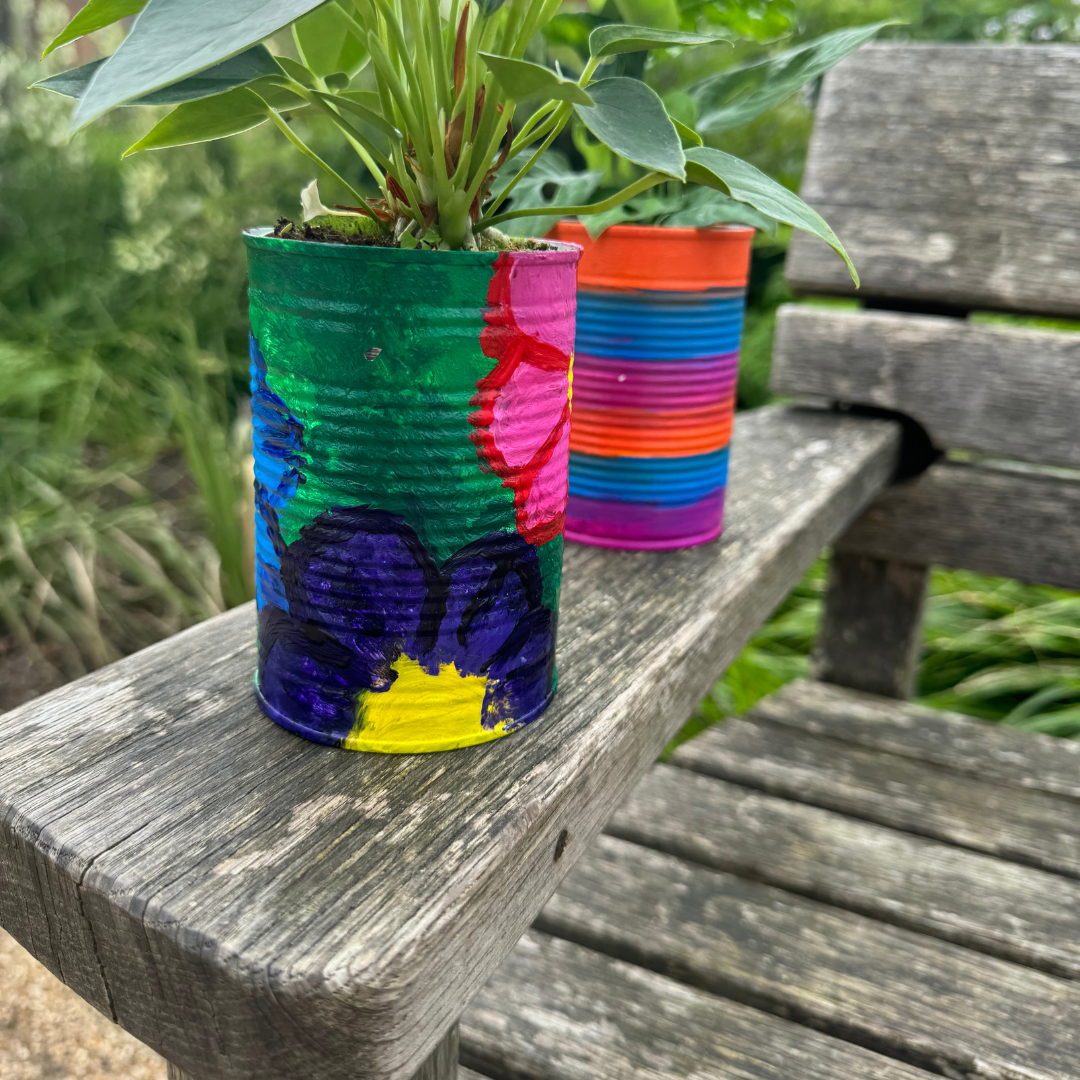
- Clean your tin can and remove any labels. Be careful of any sharp edges.
- Make drainage holes in the bottom using a hammer and nail or a drill. Place the can on a block of wood to protect your surface. An adult should help with this part.
- Add a layer of small stones or gravel to the bottom of the can for drainage.
- Add some compost or potting soil up to about 2–3 cm below the top of the tin can.
- Add your plant or seeds following the instructions on the seed packet or plant label.
- Try mixing different coloured flowers to attract pollinators.
- Gently pat down the soil around your plant.
- Label your planter so you know what’s growing inside. Water every few days, or when the soil feels dry.
- Place a tray or saucer underneath to catch any excess water.
- Choose where to display your tin can planter. You can place it on a windowsill, hang it up with string, or stand it in a sunny spot outside.
Don’t worry if you haven’t got soil or compost. You can turn a yoghurt pot, or a similar item of recycling, into a planter for some tasty cress.
- Remove the label and draw a funny face on the yoghurt pot.
- Put some wet kitchen roll in the bottom of the pot. Put some damp cotton wool on top of the kitchen roll.
- Evenly spread cress seeds on top of the cotton wool and gently press them down.
- Put the pot in a warm place that gets some sunlight - for example, a windowsill is perfect.
- Watch the cress grow, but be patient. It’ll take about seven days.
- Take a photo of your cress head and share it with your group.
You will need:
- A grassy area
- Old bicycle wheels
- Something to protect surfaces, for example a tarpaulin or newspaper
- Access to water
- Dish soap
- Cloths
- Bricks
- Paint
- Paintbrushes
- A drill
- Nuts
- Bolts
- Shovel
- Wooden posts
- Hammer and nails
How to make it:
- Lay down something to protect the surfaces.
- Everyone should clean the bicycle wheels thoroughly with a cloth and hot soapy water, making sure to get dirt, grease and grime out of the grooves.
- Rest each wheel on a brick, and then paint with a few layers of outdoor acrylic or outdoor latex paint. Alternatively, if you have a well-ventilated space you could use spray paint.
- When the wheels are dry, it’s time to build them into a trellis. If you have an uneven number of wheels lay them flat in a triangle shape; otherwise create a rectangle.
- Drill holes in the rims, where you hope to connect wheels together.
- Push a bolt through the holes in the rims, and secure the wheels together by screwing on a nut.
- Continue to join the wheels together until they are secure in the group’s chosen pattern.
- Water the patch of grass where your trellis will go, to soften the soil.
- Using a shovel, dig a trench. It should be deep enough so that only half the bicycle wheel is above the ground.
- Place the trellis into the trench, along with a wooden post on either side of the trellis. Members of the group will need to hold everything in place while others backfill the trench with soil.
- Drill some holes in the rims of the wheels which are touching the wooden posts. Hammer a nail through the rim and into the wood to fully secure the trellis to the posts.
- Everyone should help with the planting. This upcycled creation is perfect for climbing plants like ivy, clematis and honeysuckle. Alternatively, try growing some tasty treats like vine tomatoes or climbing peas.
You will need:
- An old chest of drawers
- Something to protect surfaces, for example a tarpaulin or newspaper
- Bricks
- Garden paint
- Paintbrushes
- A drill
- Hessian sheets
- Scissors
How to make it:
- Lay down something to protect the surfaces, and completely pull out each drawer. Set each drawer on old bricks so it can be painted on all sides without sticking to the newspaper or tarpaulin.
- Paint the drawers, both inside and outside, in a few coats of garden paint. Choose paint designed to protect wood from the elements, so that it doesn’t rot. Paint the empty chest of drawers too.
- When the drawers are all dry, drill some holes in the bottom of each.
- Line the bottom of each drawer with a sheet of hessian.
- Slot the drawers back into the chest and pull them out at varying widths.
- Fill the bottom of each drawer with gravel or stones to help it drain. For the drawers that are more closed, use larger stones or bricks to block out the unseen space at the back of the drawer. This means you only need to spread compost in the spaces where plants will be growing.
- Everyone should fill the drawers with peat-free compost.
- The person leading the activity should give everyone some plants or seeds to add to their planter. Write the names of the plants on lollypop sticks using marker pens.
Just because we’ve put something in a recycling bin doesn’t necessarily mean it will be recycled.
It relies on the recycling being processed properly, and if recycling is contaminated (if items haven’t been cleaned), it may just be sent to landfill.
The processing of recycling to turn our waste into new items, will also take up energy. It might even be sent to other countries – it’s thought that over two thirds of the UK’s plastic waste is sent overseas.
The recycling of plastics can also cause some problems. Plastics sent for recycling are shredded, melted down and turned into pellets, which are used to create new products. But, these pellets are easily spilled and can end up back in our environment.
They’re a form of microplastics (pieces of plastic smaller than 5mm), and they can get into our oceans and harm the wildlife there.
It’s important to think about how we can reduce and reuse too.
- Avoid non-native invasive plants if you’re going to be planting outdoors.
- Choose plants that are pesticide and peat-free, and opt for seeds that are organically grown and not genetically modified. Choose peat-free compost if you can too.
- Try growing some wildflowers to help pollinators, such as bees. They’ll love flowers that have lots of pollen, like primroses and marigolds.
- Growing fruit or vegetables will reduce your food miles (the distance food travels before it gets to our plate – sometimes thousands of miles by aeroplane). Try growing tomatoes, strawberries, herbs, lettuce and cress.
Peat is a thick and muddy natural material that is really important for our planet. It’s formed in bogs and it’s created slowly, over thousands of years, from partly decomposed plants.
Peatlands provide a home to many species, and peat can hold 20 times its own weight in water, so it can help reduce risk of flooding. If it’s dug up and sold for use in gardening, this damages these environments.
Using peat-free compost is a small way we can help the fight against climate change and protect wildlife.
Reflection
This activity was all about valuing the outdoors and helping the community. Did people enjoy getting stuck in to planting seeds or plants?
Do people think they’ll be able to take good care of the plants in their recycled planters? How will the planter help their local environment?
People could think about encouraging wildlife (including bugs) to the area and making it a greener place for everyone to enjoy.
Was anyone surprised by the items that could be reused as planters? How else could they help their local environment, encourage wildlife, or reuse things so they’re not thrown away?
Safety
All activities must be safely managed. You must complete a thorough risk assessment and take appropriate steps to reduce risk. Use the safety checklist to help you plan and risk assess your activity. Always get approval for the activity, and have suitable supervision and an InTouch process.
You must run your activities in line with the Safeguarding Code of Conduct for Adults (Yellow Card) and report any concerns to the UK HQ Safeguarding Team.
- Scissors
Supervise young people appropriately when they’re using scissors. Store all sharp objects securely, out of the reach of young people.
- Outdoor activities
You must have permission to use the location. Always check the weather forecast, and inform parents and carers of any change in venue.
- Animals and insects
Be aware of the risks before interacting with animals. Be aware of anyone with allergies, and make alternative arrangements for them.
- Gardening and nature
Everyone must wash their hands after the activity has finished. Wear gloves if needed. Explain how to safely use equipment and set clear boundaries so everyone knows what’s allowed.
- Sharp objects
Teach young people how to use sharp objects safely. Supervise them appropriately throughout. Store all sharp objects securely, out of the reach of young people.
- Glue and solvents
Always supervise young people appropriately when they’re using glue and solvent products. Make sure there’s plenty of ventilation. Be aware of any medical conditions that could be affected by glue or solvent use and make adjustments as needed.
- Rubbish and recycling
All items should be clean and suitable for this activity.
- PPE
Before completing this activity make sure you have suitable personal protective equipment (PPE). This could include eye or ear protection, gloves, and anything else you need to protect yourself. You’ll know what you need as a result of completing the risk assessment for the activity.
- Hand and electric tools
Inspect tools for any damage before each use. An adult should supervise people using tools, and people should follow instructions on how to use them correctly and safely. Tools should be properly maintained and kept sharp.
Use an appropriate surface and make sure materials are stable and supported when you’re working on them. You should cut and drill away from the body and in an area clear of other people. Be extra cautious of trailing cables and water when using electric tools. Always use a cordless tool if one’s available.
- If everyone plants similar seeds (or plants) then you could hold a growing competition. It’s up to you how you judge it – you could look for the tallest plant, the most impressive flower, or the tastiest produce.
- You could invite a local park, shop, or community centre to display your planters for everyone to enjoy.
- You could challenge the group to come up with a list of other recycled items that could be used as planters and what plants would be best to grow in them. Ideas could include: car tyres, livestock water troughs, old furniture drawers, dustbins, buckets, colanders, old hanging baskets.
- Set the materials up so everyone can access them – some people may want to work on the floor while others use a table.
- You could offer gloves if anyone doesn’t like the texture of the compost.
All Scout activities should be inclusive and accessible.