
Make origami bookmarks
You’ll need
- Coloured pens or pencils
- Scissors
- Square Paper (Approx. 20cm x 20cm)
Before you begin
- Use the safety checklist to help you plan and risk assess your activity. Additional help to carry out your risk assessment, including examples can be found here. Don’t forget to make sure all young people and adults involved in the activity know how to take part safely.
- Make sure you’ll have enough adult helpers. You may need some parents and carers to help if you’re short on helpers.
Setting up this activity
- If the paper isn’t square, you may need to cut the paper into squares before the session.
- You could have pre-folded bookmarks for people to decorate.
- You may want to make printed instruction sheets for people to follow.
Run the activity
- Gather everyone together and ask if anyone knows what origami is. Why was it created? What is it used for?
- Explain that origami’s the Japanese art of paper folding. Origami was used for ceremonial purposes as early as 6th-Century in Japan, and later became a recreational pastime. It doesn’t even have to be paper; cardboard, napkins and food bags can all be folded into a pretty creation. If you’ve been to a particularly fancy hotel, you might have seen towels folded into swans.
- Tell everyone you’re going to make origami bookmarks.
Making the bookmarks
- Place a square piece of paper in front of you, so it looks like a diamond.
- Bring the bottom corner that’s closest to you up onto the top corner, folding the paper in half, then crease the fold firmly. It should now be a triangle. Make sure the corners are perfectly lined up before you crease the paper.
- Fold the left corner of the triangle up, so that the tip aligns with the top of the triangle.
- Repeat this the right side of the triangle, so that both edges line up in the centre of the triangle. Avoid overlapping the edges or leaving a gap between them in the middle.
- Crease the folds, then unfold both so the triangle lies flat again.
- Take the top layer of the top corner and bring it down so that the tip lines up with the bottom edge of the triangle. Run your finger firmly along the fold to crease it in place.
- Pull the left and right corners up along the creases you made before as if you’re going to fold them onto the top corner. Then, fold the top of each corner into the pocket formed by the folded flap to create the final diamond shape. Tuck the left and right corners under the folded-down flap.
- If the corners aren’t folding up easily, go back and refold them to make the creases more flexible.
- If you’re having trouble making a straight fold, place a ruler under the paper as you crease it to guide you.
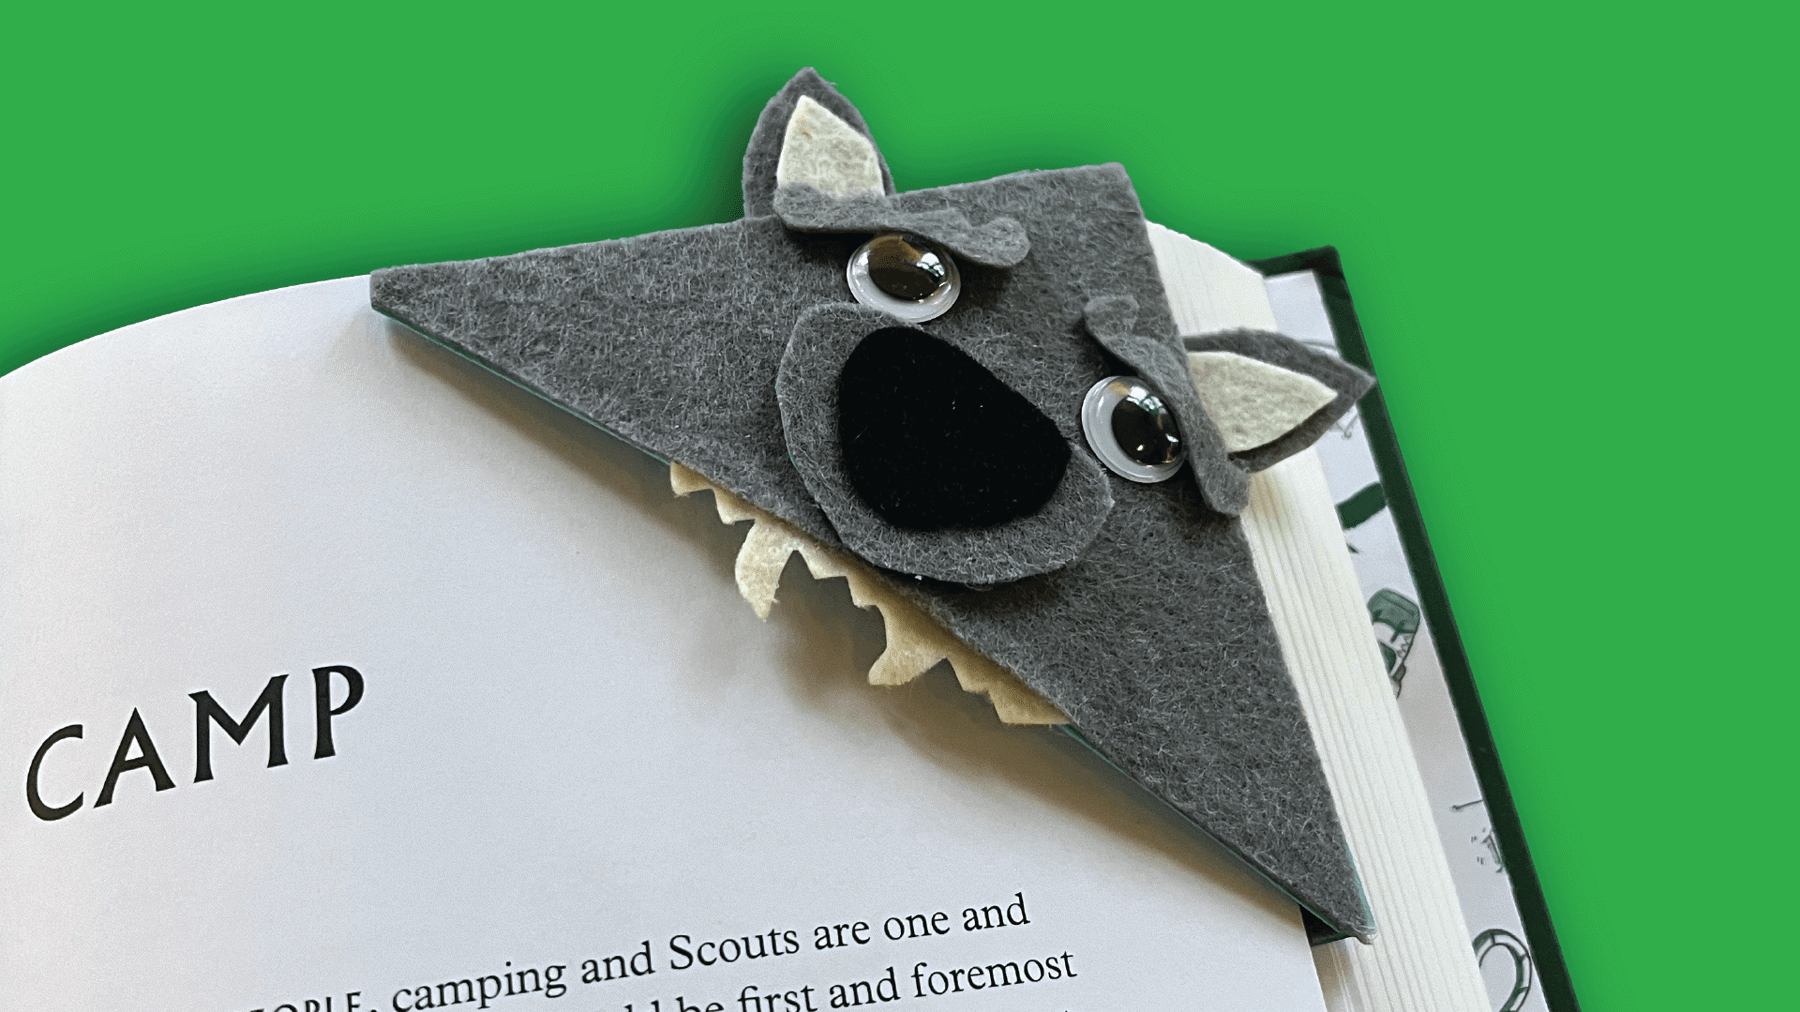
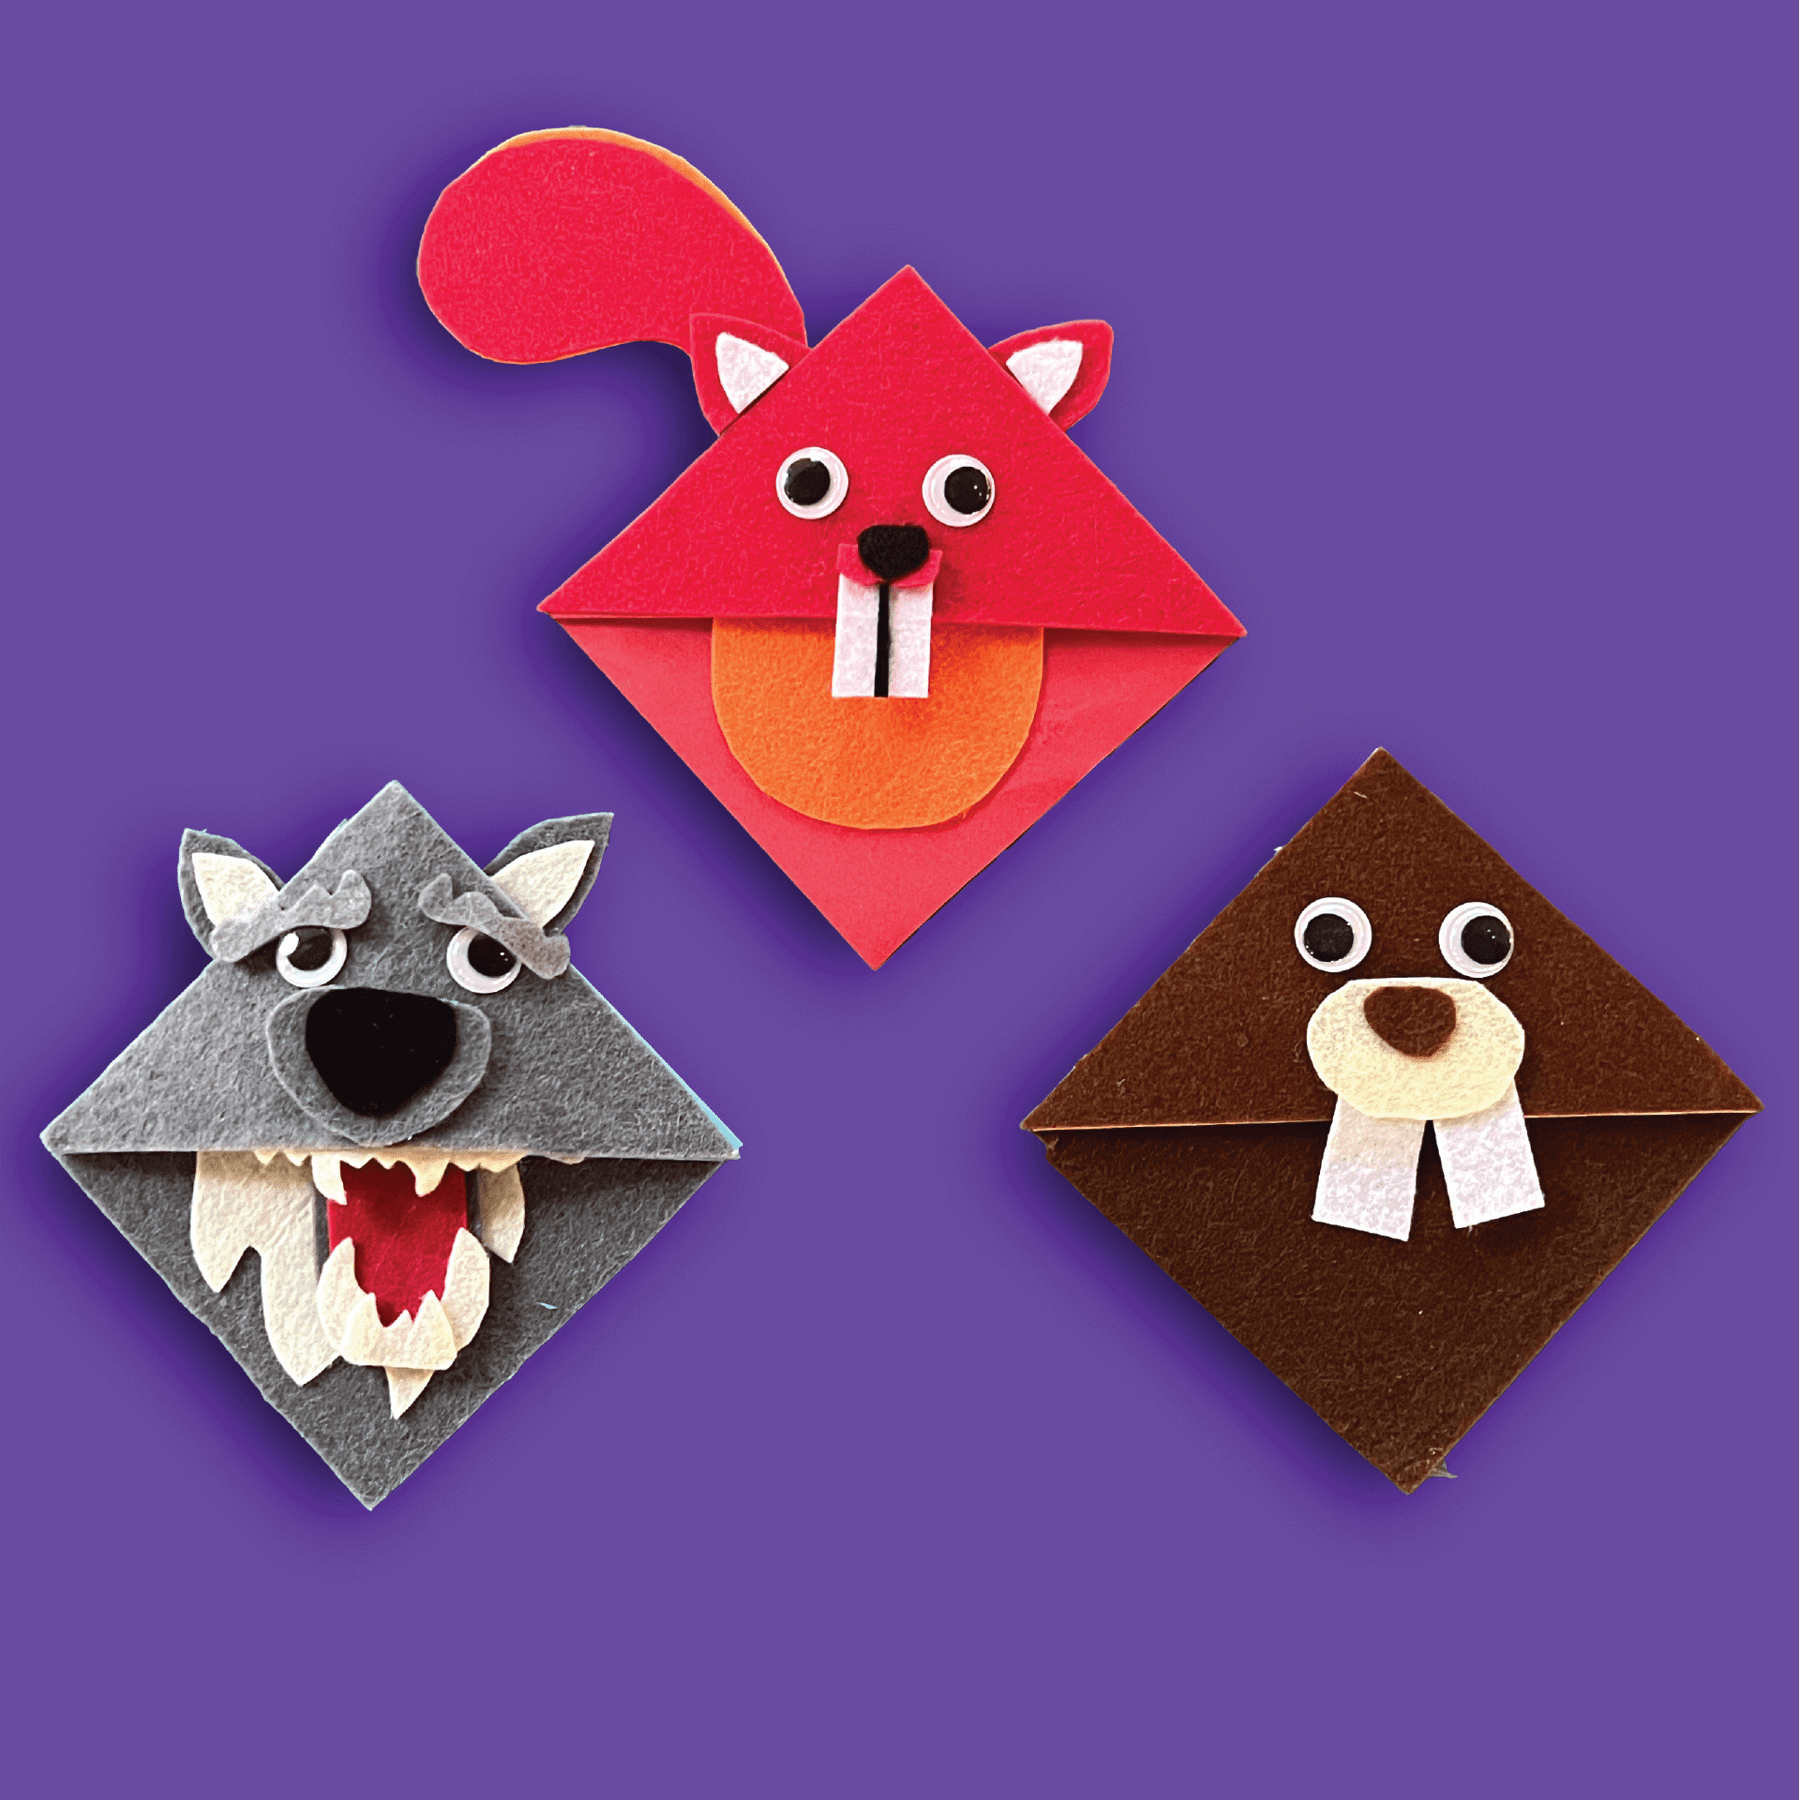
- Once you’ve finished, decorate your bookmark with craft materials, such as glitter, painted designs, stickers, or gems, for example.

Decorate the bookmarks
- People may want to draw out their design first. You could turn your bookmark into an animal, fictional character, alien or monster by gluing on googly eyes and paper ears or teeth. If you use things that could peel off, such as glitter or glued-on paper, brush a thin layer of mod podge over it and let it dry completely before using. This’ll help to prevent the decorations from coming off.
- It’s best to avoid using anything that’s too bulky to decorate the middle of the bookmark since it will affect how the bookmark sits in your book. If you want to use something bigger or chunky, such as pom poms, attach them to the outside edges instead.
- To use your bookmark, slide the pocket onto the corner of a book page.
Reflection
This activity was all about origami. Origami can improve mindfulness, improve hand-to-eye coordination, improve concentration and help with spatial awareness. What did you enjoy about making the bookmark? Did you find the paper folding relaxing at all? In this activity, you had to concentrate and focus. Did you find yourself having to concentrate or focus more than usual? Was that relaxing or stressful? What did you have to concentrate most on? How easy was it to follow the instructions? What was hard about this activity?
Origami is also easy to correct. How did you find correcting your mistakes? Did you ever want to give up or get frustrated? What made you be resilient and carry on?
You also had to express creativity in your design. What did you decide to make? How did it turn out? What did you enjoy about decorating the bookmark?
Safety
All activities must be safely managed. You must complete a thorough risk assessment and take appropriate steps to reduce risk. Use the safety checklist to help you plan and risk assess your activity. Always get approval for the activity, and have suitable supervision and an InTouch process.
You must run your activities in line with the Safeguarding Code of Conduct for Adults (Yellow Card) and report any concerns to the UK HQ Safeguarding Team.
- Scissors
Supervise young people appropriately when they’re using scissors. Store all sharp objects securely, out of the reach of young people.
- To make it easier, you could have pre-folded bookmarks for people to decorate.
- To make it harder, encourage people to create more intricate origami designs.
Provide a printed copy of the instructions for those who may need extra support. You may wish to demonstrate or do this activity in small groups so people can watch what to do.
All Scout activities should be inclusive and accessible.


You could try another origami craft, such as Japanese paper cranes or making origami Scout uniforms.
Everyone can choose their own design and be creative in a way that suits them.