
LEDs celebrate!
You’ll need
- Double sided sticky tape
- Aluminium foil
- Scissors
- PVA glue
- A4 card
- Coloured pens or pencils
- Craft materials (for example, tissue paper, pipe cleaners, stickers)
- Hole punch
- Selection of LEDs
- 3V coin battery (with circuit board pins works best)

Before you begin
- Make sure you have enough equipment for everyone to make their own greetings card.
- If you have a surplus, some people could make cards with multiple bulbs and more complex circuits.
- Cards with more than one LED will need a parallel circuit to provide them with enough power.
Run the activity
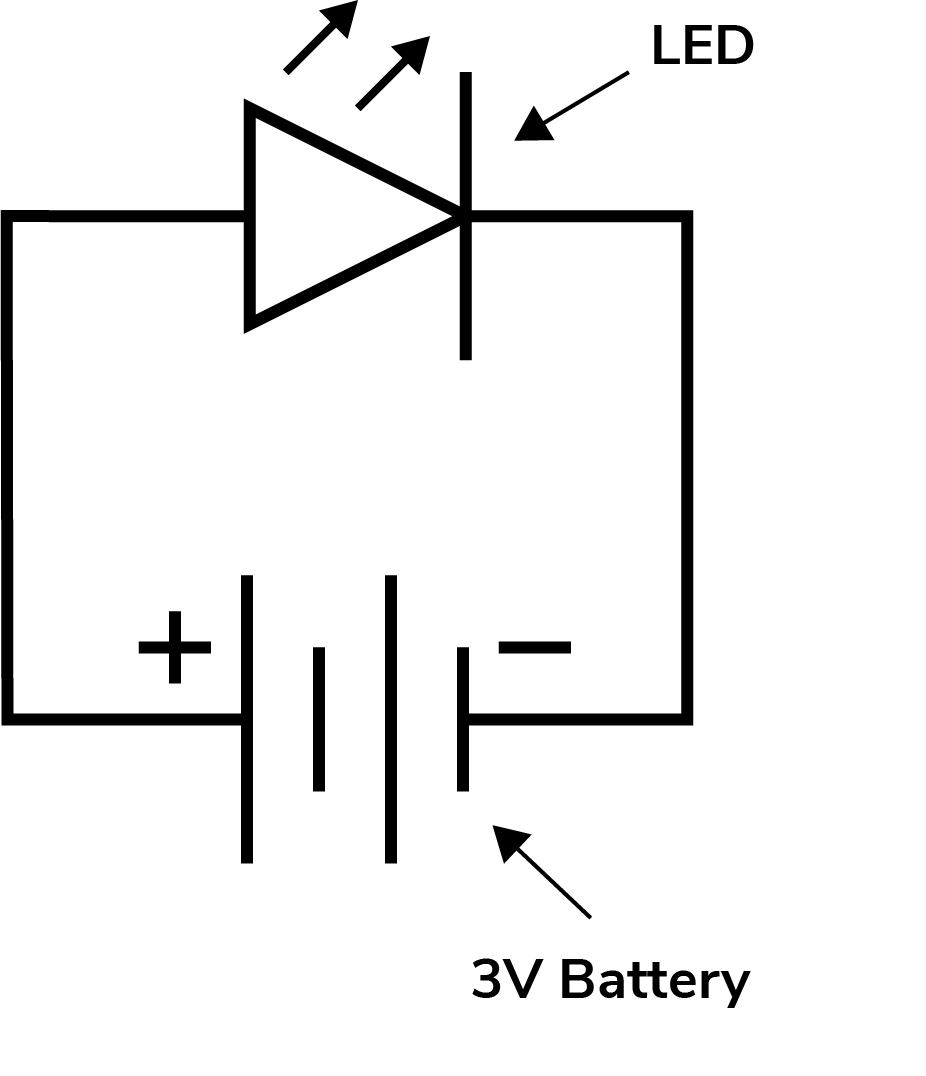
- Give out paper and pencils. Have everyone copy out the circuit diagram below. They should also label the voltage. This will be 3V for one battery, 6V for two, and so on.
- Give out the components. Have everyone lay them out on the paper where they appear on the diagram, to help keep track of what goes where. Explain how the circuit works.
- Test the battery and the LED. Place one of the terminals of the LED against one of the terminals of the battery. If both are positive or both are negative, the bulb should light up. If possible, make a note of which side on both is positive and which side is negative.
- Give out the ‘Light-up card templates’, or make your own, with your own circuit design, from scratch. Carefully, bend out the legs on the LED and the battery connectors. You want both to lie flat on the sheet of card, but you don’t want them to snap off.
- Give out tin foil. Tear off two strips and lay them next to each other. Scrunch them onto the battery at one end and the LED leg at the other, to make a circuit. See if the LED lights up.
- On paper or another sheet of card, plan out your design for the front of the greetings card. Choose a spot where the LED light will go. Think about what the light could represent in your design.
- Place your design over your template. Using a hole-punch, carefully make a single hole in the spot you want the LED to go.
- Measure out a strip of tin foil that is large enough to complete the circuit. It should be long enough to run across the card between your battery and your LED. Cover the back of the foil with double-sided tape, without removing the backing just yet. Make foil tracks for your circuit to run across, which are flat and can be attached underneath where the circuit will go.
- Tape the foil tracks to the back of your card, leaving gaps for the LED and battery to sit. The foil may need to run around the hole you made for the LED, so that the legs can sit on it.
- Tape the LED legs to the foil, with the bulb poking through the hole to the other side (the front) of the card. Press the tape down firmly to make sure there’s a good connection.
- Lightly attach the battery in the same way, but so that it can be removed again. Check that it’s the right way around, with the positive terminal connecting to the positive leg of the LED, and the negative terminal connecting to the negative leg of the LED. Turn the battery round if it doesn’t work.
- Remove the battery and place it to one side. Decorate the card using the design you made earlier. When it’s done, replace the battery more firmly and stick the card together, using the instructions on the template.
Reflection
We’ve just seen how ordinary household objects can be made part of an electric circuit. The greetings cards used foil, pins, clips and watch batteries. What property of these items made them useful components? Answer: they’re all conductors.
These items are not the only things that conduct electricity. Water is also a good conductor. Why then is it a good idea to keep the components we used away from water? Why should we be extra careful in kitchens, which are likely to contain both of these conductors?
Making a greetings card can be a lot more rewarding than going out and buying one. Who are you going to give your card to?
Safety
All activities must be safely managed. You must complete a thorough risk assessment and take appropriate steps to reduce risk. Use the safety checklist to help you plan and risk assess your activity. Always get approval for the activity, and have suitable supervision and an InTouch process.
You must run your activities in line with the Safeguarding Code of Conduct for Adults (Yellow Card) and report any concerns to the UK HQ Safeguarding Team.
- Scissors
Supervise young people appropriately when they’re using scissors. Store all sharp objects securely, out of the reach of young people.
- Glue and solvents
Always supervise young people appropriately when they’re using glue and solvent products. Make sure there’s plenty of ventilation. Be aware of any medical conditions that could be affected by glue or solvent use and make adjustments as needed.
- Sharp objects
Teach young people how to use sharp objects safely. Supervise them appropriately throughout. Store all sharp objects securely, out of the reach of young people.
- Science
Supervise young people, and only do science activities that are advised and age appropriate for your section. Test activities first, to make sure you’re confident you can lead them safely. Use protective clothing where necessary.
- Manufacturer’s guidelines
All vehicles will be different so always follow the manufacturer’s guidelines.
- PPE
Before completing this activity make sure you have suitable personal protective equipment (PPE). This could include eye or ear protection, gloves, and anything else you need to protect yourself. You’ll know what you need as a result of completing the risk assessment for the activity.
- Soldering
Soldering irons produce a lot of heat. Never touch the tip of the soldering iron on anything other than the things you’re soldering and use tweezers or clamps to hold things in place. Never solder near flammable gases or liquids or combustible materials such as wood, textiles, or paper. Make sure there’s a fire extinguisher and a first aid kit (with items to treat burns) nearby.
Wear non-flammable clothing, gloves, safety goggles, and closed-toe shoes. Cover your arms and legs to prevent burns and remove loose clothing (such as scarves).
Work in a well-ventilated area to avoid inhaling fumes and keep food and drink away from the working area to avoid contamination.
- Electronics
Remove any equipment you’re working on from the power source before you begin. Never assume the power circuit’s off – test it with a voltmeter (and then test it again to be sure). Only connect power to a circuit once you’ve finished working on it and have checked your work. Make sure your circuit isn’t overloaded, and return any covers you’ve removed.
Make sure that all electronics equipment is properly grounded. Use the right electronics tools, and always replace damaged equipment (for example, replace cables rather than repairing them with insulating tape). Always have safety equipment including a fire extinguisher, basic first aid kit, and mobile phone nearby.
Think about other uses the circuit could have. What other components could be added to create more or different functions? For example, see if you can engineer a switch into the circuit, so the light turns on and off. You could do this by making a flap in the foil on one side that disrupts the circuit. A paperclip or split-pin could work too.
An extension could be to test your design skills by adding a pop-out element to the card. Think of a way of integrating your circuit so that the LED can enhance this effect.
Make sure everyone has everything they need to complete the tasks in this activity. Pair people up or have helpers on hand to assist with fiddly bits.
All Scout activities should be inclusive and accessible.

Greetings cards are just one thing you can make with a simple circuit. Once you can make switches, you might be able to make a simple handheld game, a reading light and lots of other useful items. Go online and find out what else can be made with the components you have available.
This activity is a great opportunity for those with existing skills or an interest in electronics to share their knowledge. Encourage young people to pass on their skills to others by helping lead this activity or guiding anyone struggling.